Sunday, March 30, 2008

DB March Challenge: Perfect Party Cake

This was a really excellent challenge for March...so excellent that I ended up making it twice! The challenge was to make Dorie Greenspan's Perfect Party Cake, and we had lots of freedom in terms of fillings and flavors. The first cake I made was for my housemate's birthday. I followed the basic cake recipe, using Meyer lemons from our backyard. The cake layers didn't rise a whole bunch (it seems many folks had this problem), and we were expecting lots of folks at the birthday party, so I made another set of cake layers, eventually ending up with a super-tall cake! I filled it with lemon curd and ginger-infused whipped cream, and frosted the cake with more of the ginger whipped cream. I then covered the cake in unsweetened coconut curls that I toasted in the oven and then tossed in sugar. It fit in perfectly with the tropical theme of the party and was enjoyed by all!

Unfortunately we didn't manage to get a shot of the inside because it got gobbled up much too fast!

Then, at home for spring break, my mom and I decided to bake the cake again for my uncle's birthday dinner. This time, we couldn't find any lemon extract at the store, so we substituted orange extract and orange rind in the cake for a lovely orange-scented cake. These layers rose much better, perhaps because my mom had on hand the type of cake flour Dorie recommends (Swan's Down, as opposed to the Soft-as-Silk I had used in my first try). We split the layers and filled the cake with raspberry-rhubarb preserves and vanilla whipped cream. We frosted the cake with the remaining whipped cream and then sprinkled the cake with fresh coconut, ground up in the food processor.

Perfect Party Cake (Original Recipe from Baking from My Home to Yours)

For the Cake


2 1/4 cups cake flour
1 tablespoon baking powder
½ teaspoon salt
1 ¼ cups whole milk or buttermilk (I prefer buttermilk with the lemon)
4 large egg whites
1 ½ cups sugar
2 teaspoons grated lemon zest
1 stick (8 tablespoons or 4 ounces) unsalted butter, at room temperature
½ teaspoon pure lemon extract

For the Buttercream
1 cup sugar
4 large egg whites
3 sticks (12 ounces) unsalted butter, at room temperature
¼ cup fresh lemon juice (from 2 large lemons)
1 teaspoon pure vanilla extract

For Finishing
2/3 cup seedless raspberry preserves stirred vigorously or warmed gently until spreadable
About 1 ½ cups sweetened shredded coconut

Getting Ready
Centre a rack in the oven and preheat the oven to 350 degrees F. Butter two 9 x 2 inch round cake pans and line the bottom of each pan with a round of buttered parchment or wax paper. Put the pans on a baking sheet.

To Make the Cake
Sift together the flour, baking powder and salt.
Whisk together the milk and egg whites in a medium bowl.
Put the sugar and lemon zest in a mixer bowl or another large bowl and rub them together with your fingers until the sugar is moist and fragrant.
Add the butter and working with the paddle or whisk attachment, or with a hand mixer, beat at medium speed for a full 3 minutes, until the butter and sugar are very light.
Beat in the extract, then add one third of the flour mixture, still beating on medium speed.
Beat in half of the milk-egg mixture, then beat in half of the remaining dry ingredients until incorporated.
Add the rest of the milk and eggs beating until the batter is homogeneous, then add the last of the dry ingredients.
Finally, give the batter a good 2- minute beating to ensure that it is thoroughly mixed and well aerated.
Divide the batter between the two pans and smooth the tops with a rubber spatula.
Bake for 30-35 minutes, or until the cakes are well risen and springy to the touch – a thin knife inserted into the centers should come out clean
Transfer the cakes to cooling racks and cool for about 5 minutes, then run a knife around the sides of the cakes, unfold them and peel off the paper liners.
Invert and cool to room temperature, right side up (the cooled cake layers can be wrapped airtight and stored at room temperature overnight or frozen for up to two months).

To Make the Buttercream
Put the sugar and egg whites in a mixer bowl or another large heatproof bowl, fit the bowl over a plan of simmering water and whisk constantly, keeping the mixture over the heat, until it feels hot to the touch, about 3 minutes.
The sugar should be dissolved, and the mixture will look like shiny marshmallow cream.
Remove the bowl from the heat.
Working with the whisk attachment or with a hand mixer, beat the meringue on medium speed until it is cool, about 5 minutes.
Switch to the paddle attachment if you have one, and add the butter a stick at a time, beating until smooth.
Once all the butter is in, beat in the buttercream on medium-high speed until it is thick and very smooth, 6-10 minutes.
During this time the buttercream may curdle or separate – just keep beating and it will come together again.
On medium speed, gradually beat in the lemon juice, waiting until each addition is absorbed before adding more, and then the vanilla.
You should have a shiny smooth, velvety, pristine white buttercream. Press a piece of plastic against the surface of the buttercream and set aside briefly.

To Assemble the Cake
Using a sharp serrated knife and a gentle sawing motion, slice each layer horizontally in half.
Put one layer cut side up on a cardboard cake round or a cake plate protected by strips of wax or parchment paper.
Spread it with one third of the preserves.
Cover the jam evenly with about one quarter of the buttercream.
Top with another layer, spread with preserves and buttercream and then do the same with a third layer (you’ll have used all the jam and have buttercream leftover).
Place the last layer cut side down on top of the cake and use the remaining buttercream to frost the sides and top.
Press the coconut into the frosting, patting it gently all over the sides and top.

Serving
The cake is ready to serve as soon as it is assembled, but I think it’s best to let it sit and set for a couple of hours in a cool room – not the refrigerator. Whether you wait or slice and enjoy it immediately, the cake should be served at room temperature; it loses all its subtlety when it’s cold. Depending on your audience you can serve the cake with just about anything from milk to sweet or bubbly wine.

My Variations
I used whipped cream in both of my cakes, which I thought was yummier than a buttercream (of course, I didn't taste both!). The vanilla whipped cream just involved a little vanilla extract. The ginger whipped cream was a little more complicated but definitely worth it. My housemate Jessie made a ginger simple syrup by boiling water, sugar, and chopped ginger until slightly thickened, and then strained it. We chilled it, which helped it thicken up even more. We added a healthy measure of simple syrup to the whipped cream until it tasted sweet enough (but not too sweet!) and then added in tons of grated fresh ginger until the cream was sufficiently gingery (it did get more gingery in the fridge before we ate it). In both cases, I made the whipped cream pretty thick so it would spread well and hold the cake layers together.

Monday, March 17, 2008

Peanut Butter- Milk Chocolate Cupcakes

Peanut butter and milk chocolate are one of my most favorite combinations, so I jumped at the chance to make this recipe from Cupcakes! They were tasty, although I would tend to call them more of a muffin in terms of texture--they were a little drier and denser than I was expecting. The frosting was good but nothing to write home about...I think if I made these again, I would use my standby chocolate frosting recipe and replace the bitter/semi/unsweetened chocolate with milk, to see how that turned out.

Peanut Butter Cupcakes

1 c flour
1 tsp baking powder
1/4 tsp salt
6 T butter at room temp.
3/4 c smooth peanut butter
1 c packed dark brown sugar
1 large egg
1 tsp vanilla
1/2 c milk

1. Preheat oven to 350 degrees.
2. Sift flour, baking powder, and salt in a medium bowl and set aside.
3. In a large bowl, use the electric mixer on medium to beat the butter, peanut butter, and brown sugar until smooth and lightened, about 1 minute. Mix in the egg and vanilla, and beat for 1 minute, until smooth. On low speed, add the flour in 3 additions, alternating with 2 additions of the milk. Mix just until the flour is incorporated and everything looks smooth.
4. Fill each cupcake liner with a generous quarter cup of batter. Bake until firm and lightly browned, about 22 minutes. Cool 10 minutes in the pan.

Milk Chocolate Glaze

1/4 c heavy cream
1 T butter
1 c chopped milk chocolate (5 3/4 oz.)
1/2 tsp vanilla

1. In a medium saucepan, heat cream and butter until hot (about 175 degrees or when tiny bubbles form--not boiling!) Remove from heat, add chocolate, and let sit 30 seconds. Add vanilla and whisk until smooth. Let sit at room temperature until thick enough to spread on cupcakes.

Cupcakes can be covered and stored at room temperature for up to 3 days.

Monday, March 10, 2008

Honey-Whole Wheat Bread

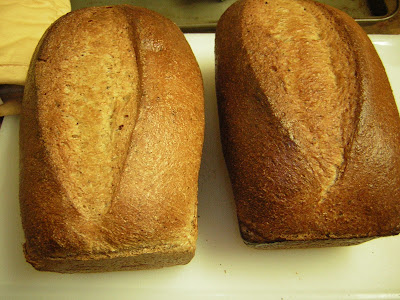
This was my first attempt at solo-whole wheat bread baking. It was tasty, but two loaves proved to be a bit much as it was pretty hearty. I think next time I would freeze or give away one of the loaves. I liked the bread, although I found it a little dry...I think I like a bread with a little fat in it (this has only got fat in the glaze on top). It was certainly fun to knead though, and in any case more delicious than grocery store bread.

Honey-Whole Wheat Bread (From Martha Stewart's Baking Handbook)

3 1/2 c warm water
3 T honey
2 envelopes active dry yeast
4 1/2 c bread flour
4 1/2 c whole-wheat flour
1 c wheat germ
2 T salt
oil
1 large egg yolk
1 T heavy cream

1. Combine warm water, honey, and yeast in a large liquid measuring cup, stirring until yeast dissolves. Let stand until foamy, 5 minutes.

2. In a large bowl, whisk together 4 c bread flour with all the whole wheat flour, the wheat germ, and the salt. Make a well in the center and pour in the yeast mixture. Stir with a wooden spoon until combined.

3. Turn out the dough on a lightly floured surface. Gently knead in the remaining 1/2 bread flour a little at a time until the dough is smooth and elastic, 10-15 minutes. Place in a lightly oiled bowl and cover with lightly oiled plastic wrap. Let rise until doubled in bulk 1 to 1 1/2 hours.

4. Preheat oven to 400 degrees. Brush 2 9x5 loaf pans with oil. Punch down the dough, then turn out onto a lightly floured surface. Divide in half. Flatten one half into an oval the length of the pan and roll up lengthwise, gently pressing as you go to form a tight log. Place the log, seam side down, into a prepared pan. Repeat with remaining dough. Cover load pans with oiled plastic wrap and let rise until doubled in bulk, 30-45 minutes.

5. Using a sharp knife, slash the loaves down the center to make one long slash. In a small bowl, beat the egg yolk and cream together, then brush over the tops of the loaves.

6. Bake until deeply golden brown, 50-60 minutes. (If they brown too fast, cover with tin foil.) Transfer to wire rack and let cool 5 minutes; then turn out loaves and cool before serving.

Warning--these rose quite a bit in the oven for me...I had them on the top rack because things on the lower rack tend to burn on the bottom...and they rose so high they got stuck by the lip of the oven door and I had to pull them out very trickily...so don't go for the top rack on these. :)

Sunday, March 9, 2008

Challah!

Sorry for the long delay in posts...I just took my first preliminary field exam in my PhD program and I've been studying for what seems like ages. I don't know what to do with myself now that it's over! (Hmm, well, studying for the rest of my classes would likely be a good idea...) Anyway, here's catching up on some old photos:

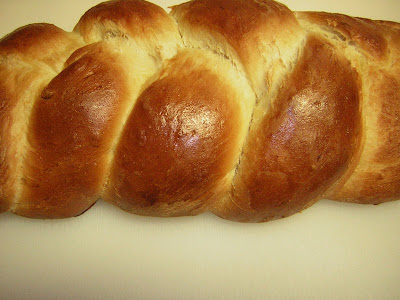
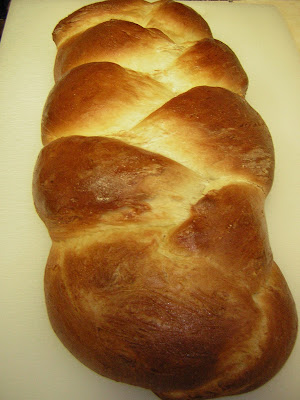
After my success with Julia Child's French Bread, I decided to try my hand at Challah. I was looking for something buttery and delicious, but perhaps not so buttery as the brioche my mom and I made over Christmas. This recipe from Mollie Katzen fit the bill perfectly. It has hardly any butter or eggs, but still manages to taste tender and eggy and buttery without being too rich. How does she do it? I guess it is magic.

The best part of this bread: it does not take 7 hours to make! The second best part is that it makes a huge amount of bread...at first we thought it would be waaaaay too much, but somehow we managed to eat both enormous loaves in about two days. Yum!


Challah (from Mollie Katzen's The New Enchanted Broccoli Forest)

2 1/2 c wrist temperature water
1 package active dry yeast
1/2 c sugar or honey
4 T melted butter
3 eggs (1 for crust)
1 T salt
1/2 c raisins (optional)
8-9 c unbleached white flour
a little oil for the trays
poppy or sesame seeds (optional)

1. Place water in a large bowl. Sprinkle in the yeast. Beat in the sugar or honey, butter, 2 eggs, and salt with a wire whisk.
2. If using, stir in raisins. Then add flour 1 cup at a time, whisking after each addition. (Start using a wooden spoon as needed.) Knead the dough until smooth, elastic, and no longer sticky. (The recipe says you can do this in the bowl, but I found it much easier on a lightly floured surface.) Cover dough with a clean cloth and set in a warm place for 1 1/2 hours or until doubled in bulk
3. Punch down the dough and turn out onto a floured surface. Divide in half, and knead each half for about 5 minutes, adding flour if it gets a little sticky. Divide each half in thirds, roll into snakes, and bread.
4. Lightly oil two baking trays and place a finished braid on each. Cover with a towel and let rise another hour, until doubled in bulk. Meanwhile, preheat oven to 375 degrees.
5. Bean the remaining egg in a small bowl. Brush a generous amount over each braid and sprinkle with seeds, if using. Bake 40 minutes or until the braids give off a hollow sound when thumped on the bottom. Cool on a rack 30 minutes before eating.

We liked the bread plain, with jam and butter, and as french toast. It was also amazing as the outside of a grilled cheese sandwich: